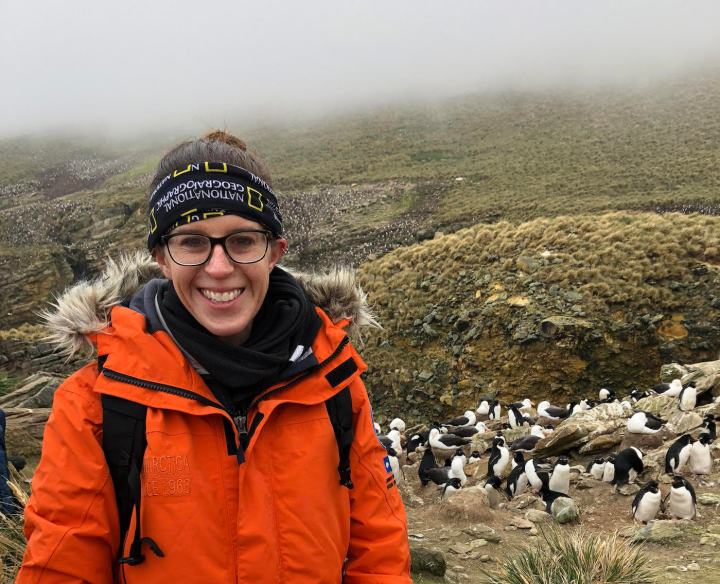
Our Strategy Share series features innovative ideas, projects, and approaches from our community of educators. This post was written by Jessica Parra after her expedition to South Georgia and the Falklands as a Grosvenor Teacher Fellow with Lindblad Expeditions and National Geographic Education.

When I traveled to South Georgia as a Grosvenor Teacher Fellow, I felt compelled to read Alfred Lansing’s Endurance, about Ernest Shackleton’s ill-fated attempt to transect Antarctica. Shackleton came to South Georgia to get help for the men he left on another Antarctic island. I was intrigued by his perilous journey and wanted to re-enact this epic trek on South Georgia once I got there. Unfortunately, in all the excitement of seeing icebergs, dodging fur seals, and trekking up snowy hills, I forgot to do my re-enactment. However, upon looking back at my photos on the ship with my shipmates, I realized I could loosely tell Shackleton’s story with photos I happened to take onshore.
This experience made me start thinking about storytelling with pictures. In first grade, when learning to write, one of our standards is to tell a series of events in order and also to add details and enhancements to strengthen writing. Students can usually sequence events pretty solidly, but adding details is always a challenge. As I put my Shackleton story together with the photographs, I wondered if students could practice sequencing with a series of photos, and whether the visual scaffolding would help them to practice with details and enhancements.
Since I fancy myself a traveler, I decided to use different photos from my own travels to help my students with this endeavor. I was hoping that, along with writing practice, my students would gain a bit of geo-literacy by locating photos on a map and seeing features of that place. An added bonus is that I am in some of the pictures, and I find that with first graders, seeing a friendly face in a photo makes the place real and able to be visited. I used photos from a hike in South Africa, a trip down the Great Ocean Road in Australia, and a race I ran with my 8-year-old niece in Pennsylvania, among others.

I labeled the backs of some photos with locations and sequences, as a scaffold for students who needed it. Some sequences are subtle, based on light and clothing changes, while others are clear, such as our hike up Table Mountain in South Africa. How you label or how much you label the sequence will depend on your class and age range. I plan to extend this activity in the future by adding clock times on the back so the students will use math skills to sequence as well.
To introduce this activity, I went over the temporal words that are important for sequencing, and we did a model together using a photo series. We wrote all of the temporal sentences first, one per page, with a plan to fill in the details the next day. For students just starting out on this journey, I thought that focusing on one skill per day would work best.

Thus, as the first assignment, students had to look at the pictures and do the sequence sentence. For example, “First, I started at the bottom of Table Mountain,” on page 1; “Second, I climbed up the hill,” on page 2; “Third, I had to stop to take a break,” on page 3; and “Fourth, I made it to the top!” on page 4.
The next day, we focused on looking at the pictures and describing them using adjectives and details. The detail-writing took a few days’ worth of lessons, and then we enhanced the story further with illustrations.
After we completed our main objective of using photos to enhance sequence writing with details, we went back to the locations and found them on a big map. The students were excited to see all the places they had “been.” They were so excited to start their next writing piece and visit a new country.
I teach three rotations of students, so I experimented with different setups of this activity. All rotations got the same mini-lessons, but in one case, I assigned a photo series to a table; in another, I let students pick where they wanted to “go” and work in interest-based groups; and in the final option, they picked a location out of a hat and worked on that one. They all worked reasonably well, but the interest-based groups worked the best. Having a say in the location pushed students to that extra little level of engagement. In the following year, all the classes did it that way.

I ended up loving this activity and unit, and it’s one that I’ll revisit every year. It was a little expensive to print the photos initially, but the students were very respectful of them, and I’ll be able to keep them from year to year. I plan to keep adding photos when I go on new adventures or simply have more time to peruse my old travel photos. Remember—the photos I used were from past trips, not taken with a plan for this activity.
When considering photo series for your own classroom, I don’t think it’s necessarily important for the place to be interesting or far away. Printed pictures are a novelty these days, so the students will be excited about them regardless. Students will be just as interested about you documenting your trip to the grocery store as your trip to Morocco. I hope your students enjoy learning about the world and writing about it as much as my students did!
Jessica Parra is a first-grade teacher in Washington, DC.
This post reflects a Grosvenor Teacher Fellow’s field-based experiences on a voyage with Lindblad Expeditions. The Grosvenor Teacher Fellowship is a professional development opportunity for pre-K–12 educators made possible by a partnership between Lindblad Expeditions and National Geographic Education.


